Cradle to Cradle Cutting Board
From garden maintenance to kitchen tool
There's no shortage of cutting board tutorials online - this story takes a different path. It's about transformation: how garden maintenance became an opportunity to create something beautiful and functional, turning branches destined for firewood into treasured kitchen tools.
The journey began last winter in a wild, overgrown garden at our new home. During the essential task of tree trimming, each cut revealed glimpses of the wood's hidden beauty beneath the bark. Those moments sparked a simple thought: "Let's see what we can do with you?"
Nature provided an interesting challenge - some pieces were cracked, others hollowed by ants. Rather than seeking perfect lumber, this project embraced what the garden offered, imperfections and all.
The parallel tasks of setting up the TinyTaller workshop and managing the garden meant the cut branches lay waiting longer than ideal, allowing some cracks to deepen. Despite using a quality 13mm blade, the small Metabo bandsaw proved somewhat underwhelming for the task. Its modest 110mm cutting height and limited motor power meant frequent stalling, as well as requiring extra steps to cut and plane the larger branches before splitting. Yet somehow, this humble saw managed to process all the olive, almond, and carob branches into workable pieces.
The Andalusian summer, with its persistent drought, accelerated the typical drying timeline. By November, moisture readings showed a consistent 8-9% throughout the carob pieces - perfect for the next phase.
The boards' journey continued through the jointer, though only on their flat sides. A table saw with a 90-degree taper jig handled the rough edges before the pieces met the planer. Each pass revealed more of the wood's character, transforming rough-cut lumber into refined boards. While the process took longer than anticipated, it offered valuable lessons in patience and a deeper appreciation for wood as a precious resource.
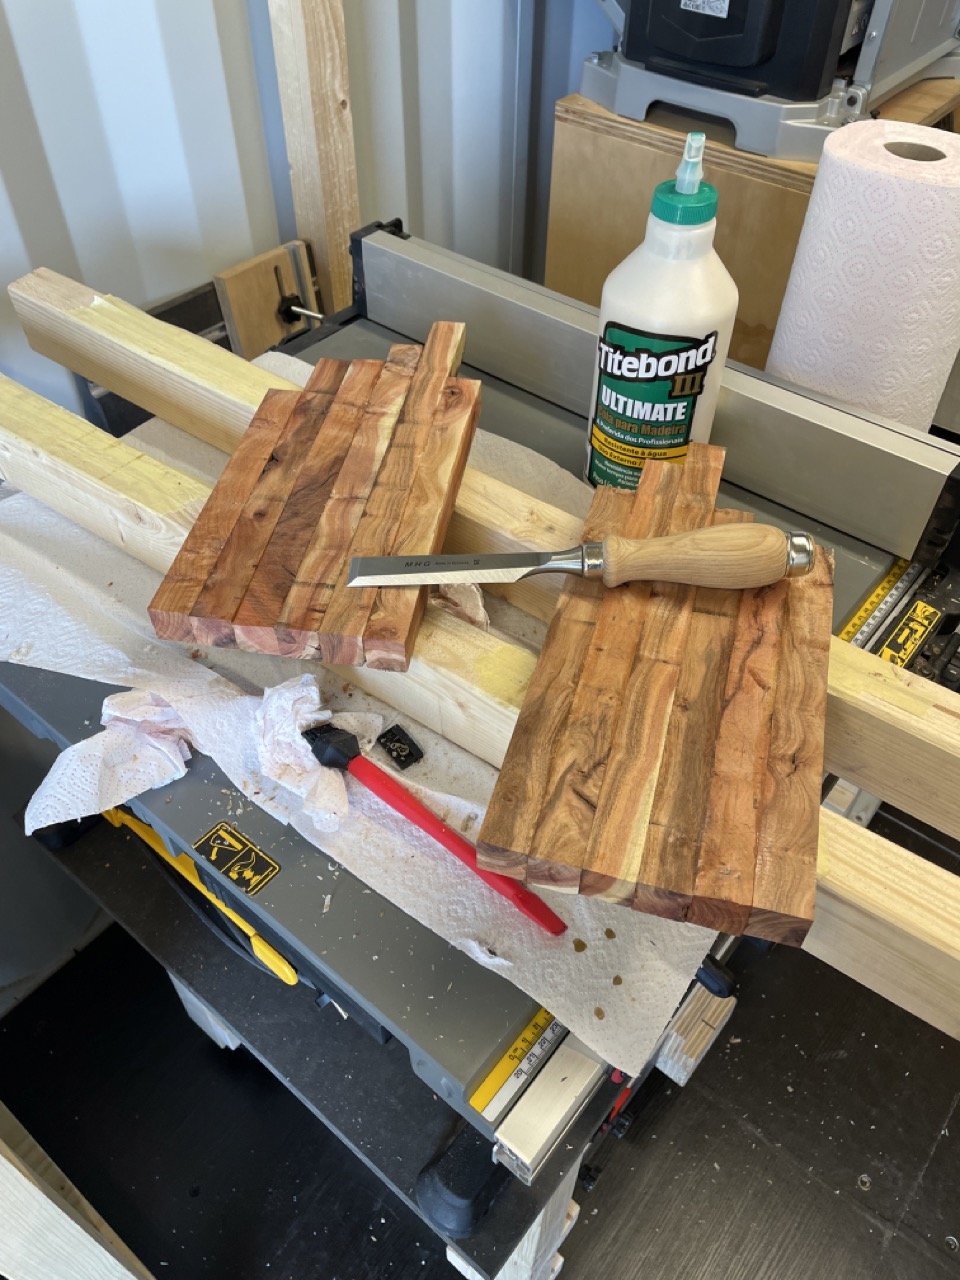
The decision to create cutting boards influenced the early splitting thickness of 30mm, allowing for material loss during processing. After jointing and planing, the boards settled at 26mm - perfect for creating square end-grain pieces. Careful sorting and arrangement of the strips preceded the glue-up process, first into initial boards, then cut and reassembled for the final end-grain pattern.
The finishing process brought everything together: final passes through the jointer and planer, precise sizing on the table saw, rounded edges with the router, and progressive sanding from 80 through to 320 grit. A food-safe finish with calendula extract completed the transformation.
This journey offered rewards beyond the finished pieces. The cradle-to-cradle process fostered a deeper connection with both materials and methods, while developing proficiency with various tools and techniques. Perhaps most importantly, it taught valuable lessons about patience in craftsmanship.
In future posts, we'll take deeper dives into working with these specific wood species, explore the unique challenges and solutions of processing garden wood. Subscribe to join the ongoing journey from TinyTaller.
Looking to create your own cutting boards? Here are some helpful resources from which I learned:
The ultimate guide to making a wooden end-grain cutting board by Steve Ramsey
End Grain Cutting Boards Are The Best! by Hess Woodworking
Turning my Failed Roll Up Chair into an End Grain Cutting Board with a Juice Groove by 3x3 Customs - Tamar
Make Money With These Simple Maple End Grain Cutting Boards by Jonathan Katz-Moses


