Conquering Router Dust: Two Collection Systems
Anyone who's worked with a router knows the challenge I'm about to describe—these tools are notorious dust slingers. It's not just about keeping your workshop clean; uncollected dust can wreak havoc on your router bits and, more importantly, your lungs. When I tackled dust collection for my router table extension, I knew it had to be done right.

A Tale of Two Scenarios
Router work typically falls into two categories, each requiring its own dust collection approach:
Working with the fence
Covered and other operations without the fence
The fence-guided operation was straightforward enough. I incorporated a 40mm PVC tube into the 50x50mm aluminum profile of the fence, creating an efficient dust capture system behind the bit gateway. Simple, effective, done (described in more detail here as part of the fence).


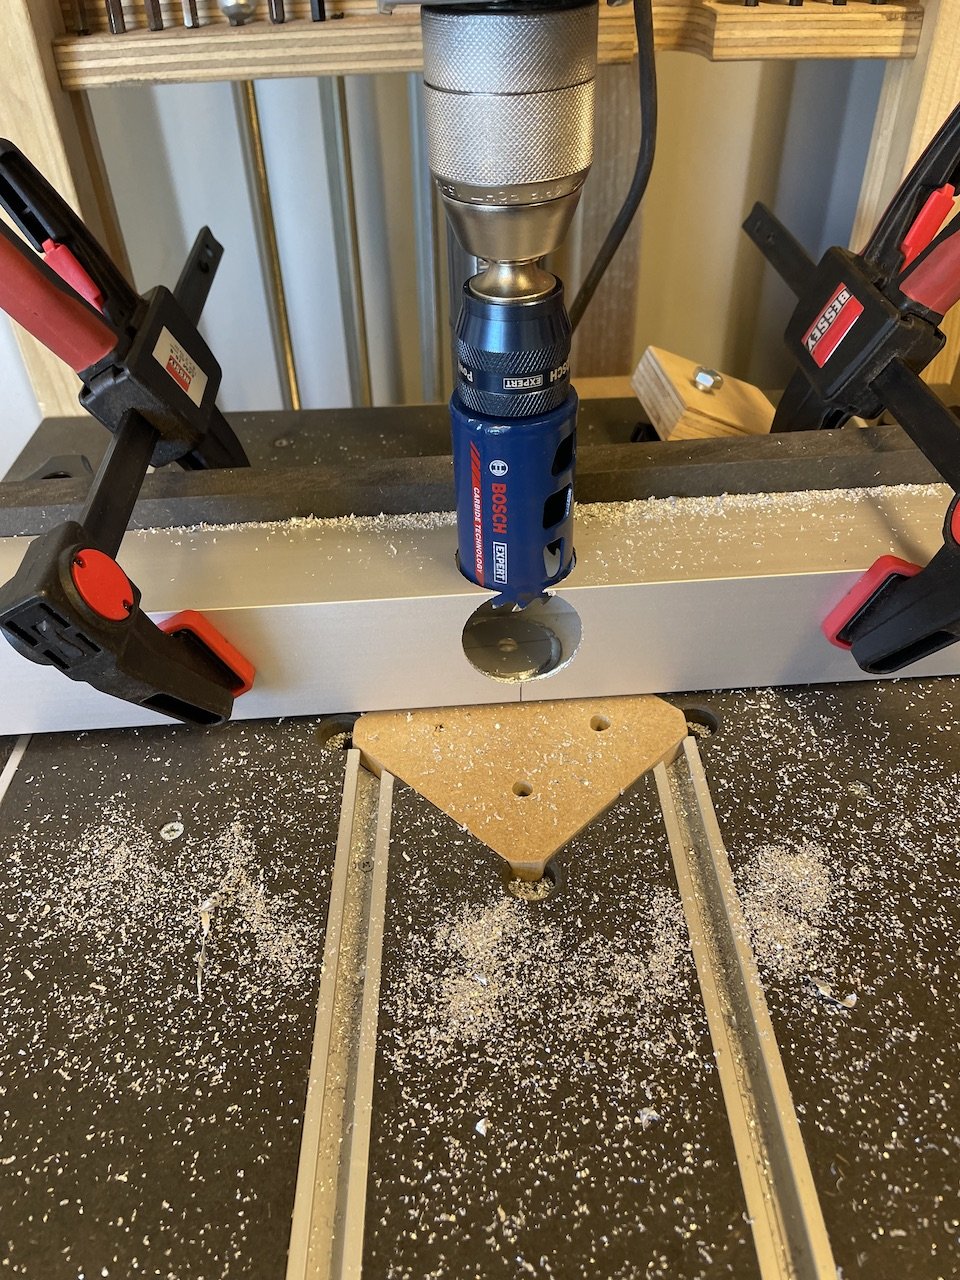

But the story gets more interesting when we talk about collecting dust from below.
The 3D Printing Adventure
I discovered a promising solution from Ingo, a fellow woodworking enthusiast in Germany. He'd created a 3D-printed cylinder for the same Enjoywood router lift I was using, complete with a vacuum hose connection. Better yet, he shared his design files. Perfect, right?
Well, not quite.
When Plans Meet Reality
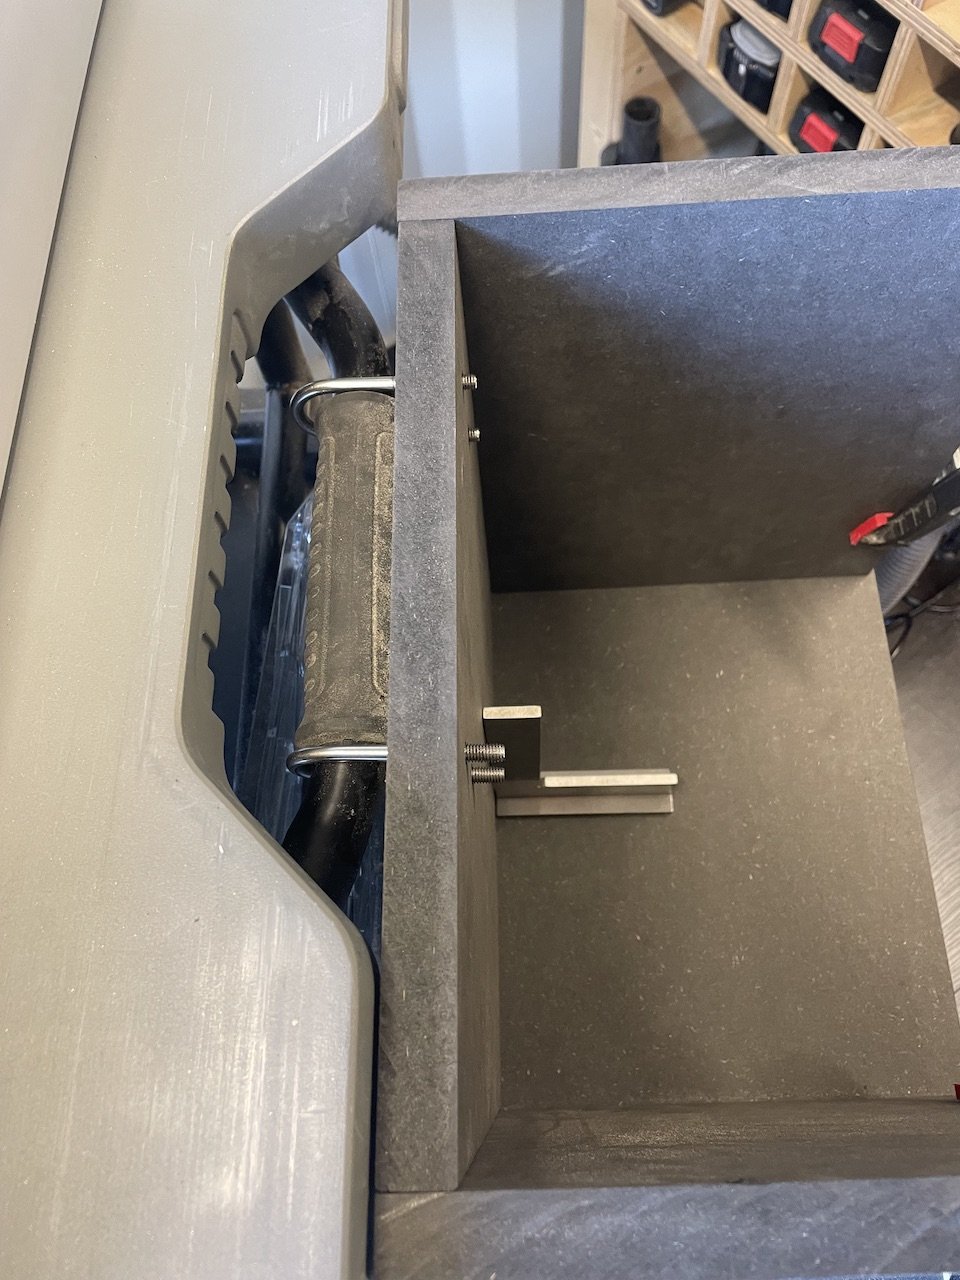
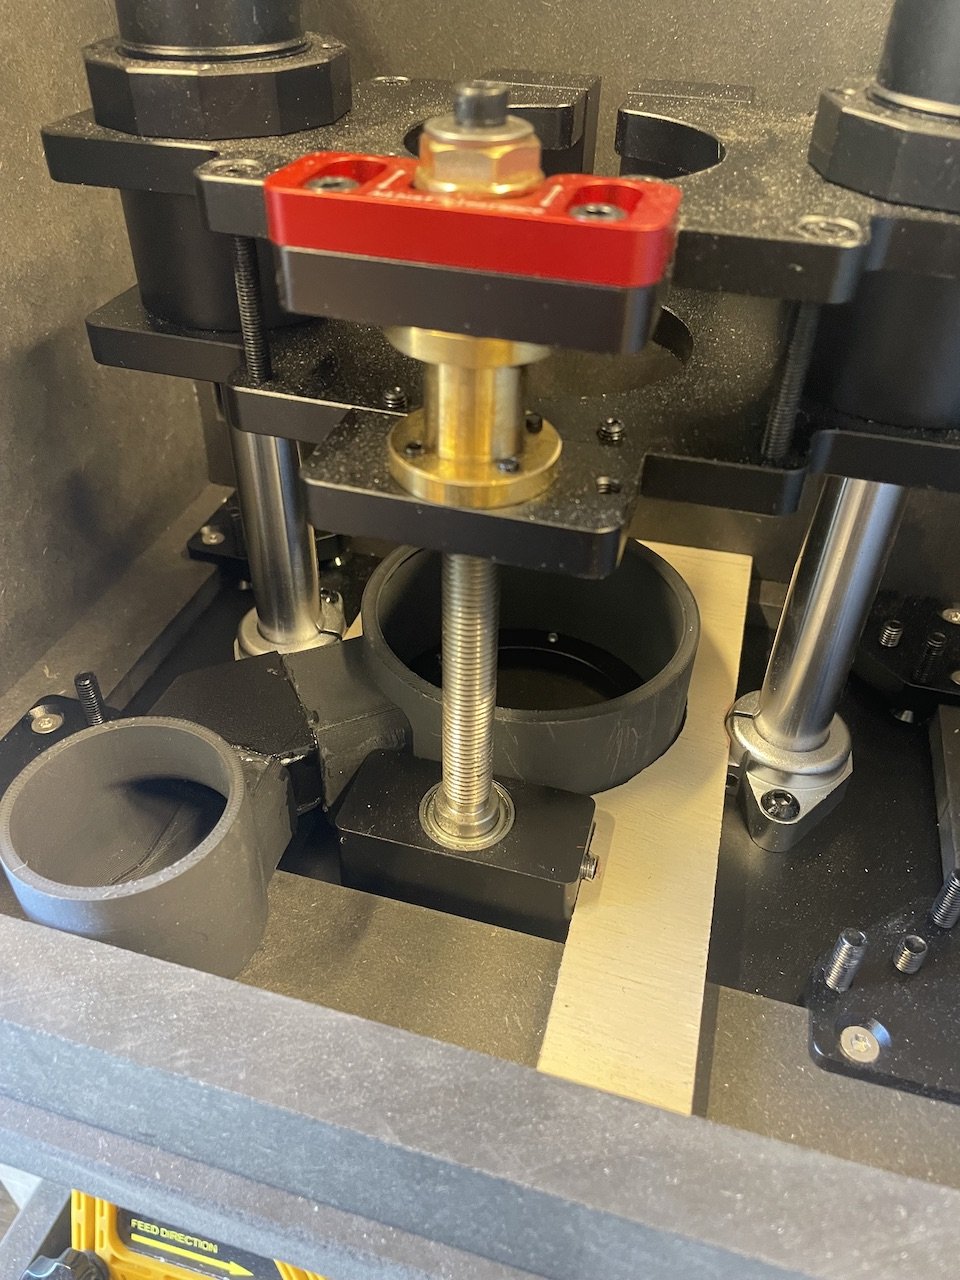
Having the part printed was exciting—until I tried to install it. Those two centimeters of misfit might as well have been two meters. The fundamental issue? Ingo designed his solution for a folding router table, while I had built a solid shelf with a back wall. His design assumed clearance for a straight tube connection facing the back of the table; I needed an angled one facing the opposite direction to work within my confined space.
Creative Problem-Solving
IMy first instinct was to modify the original 3D file, but I don’t have a 3D printer and the learning curve for the necessary software seemed steep for a one-off solution. Then it hit me: why not literally cut to the chase?


Here's what I did:
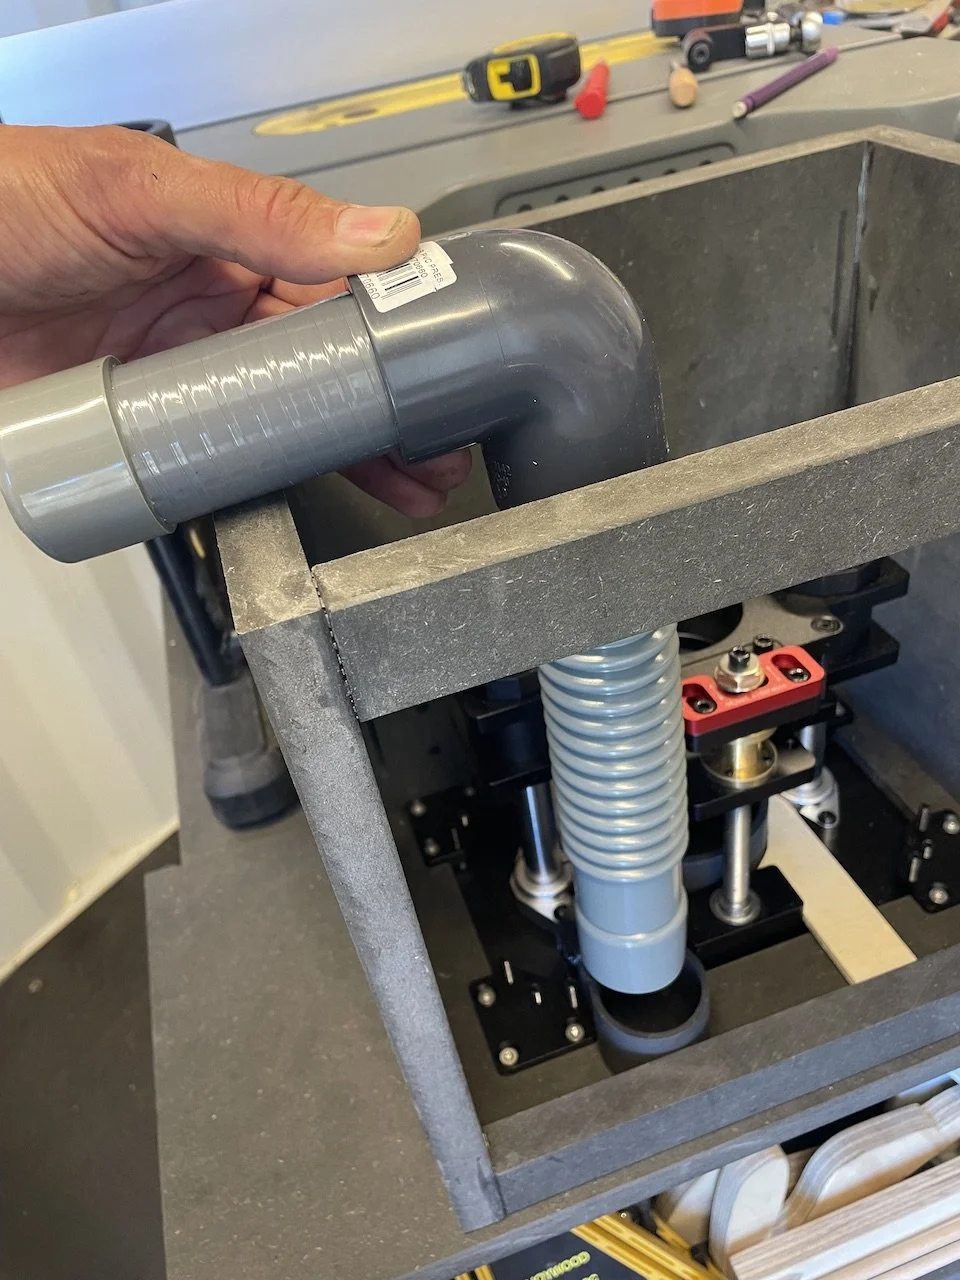
Cut the 3D-printed part in two
Ordered plastic sheets for a custom connector
Created a template (on the back of an envelope—sometimes the best tools are the simplest ones)
Cut the plastic sheets to size
Glued the connector part together
Used 5-minute epoxy to unite all three pieces
Is it as aesthetically pleasing as a single 3D-printed piece? No. But since it lives hidden beneath the router insert, function trumps form here.
The Final Touch


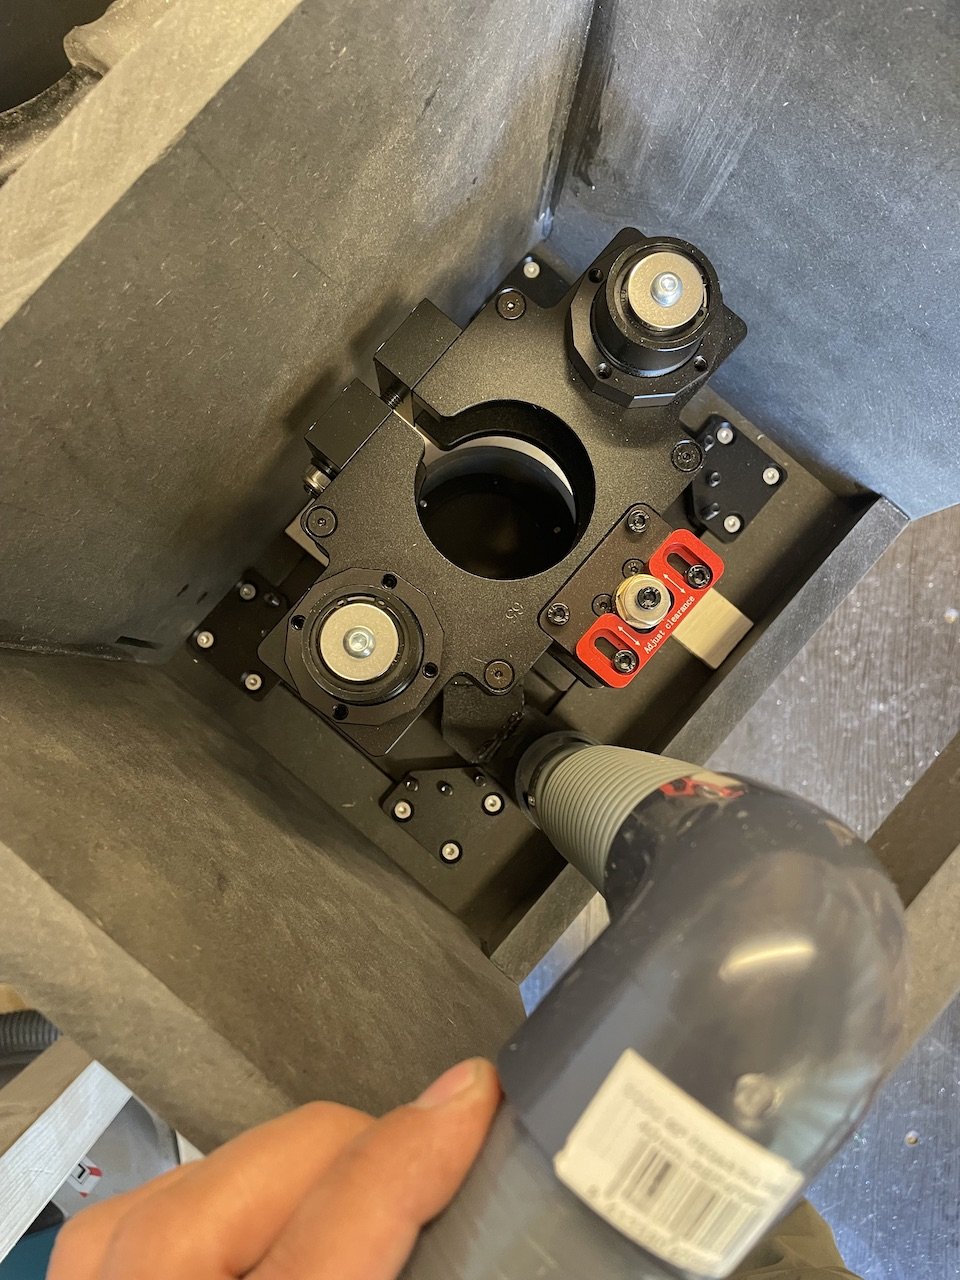
For stability, I added a 5mm plywood mount beneath the router insert. Instead of permanent adhesion, I secured it with three pivoting wooden rods—making future modifications possible if needed.
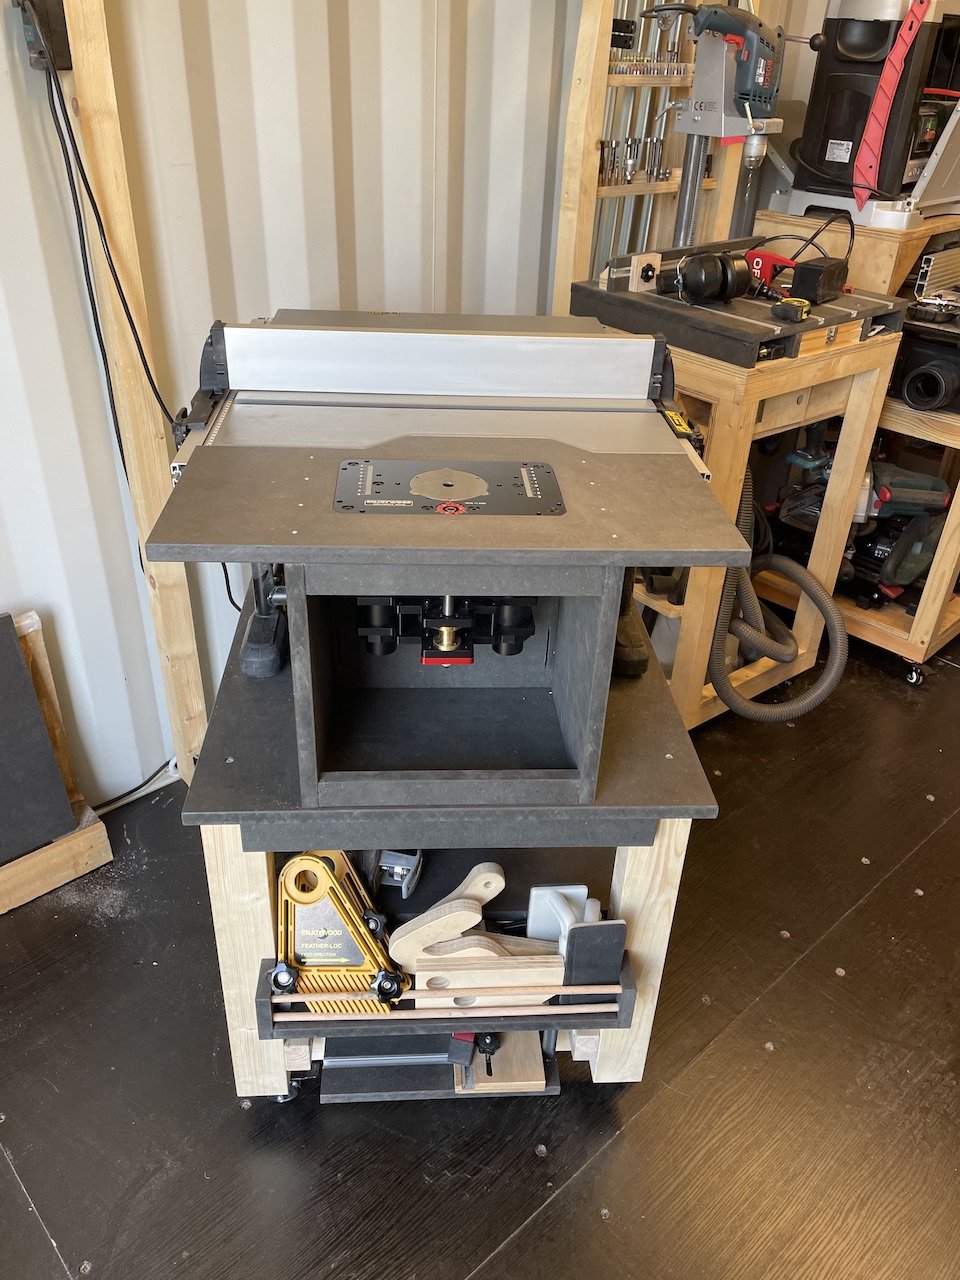
The result? Perfect dust collection from both above and below. Yes, it took some extra problem-solving and elbow grease, but seeing my router table in action now, with virtually no dust escape, makes it all worthwhile.
Sometimes the best workshop solutions aren't the prettiest—they're the ones that solve your specific problem in your specific space.