Building a Router Table Extension for my DeWalt 7492: A Journey in Workshop Integration
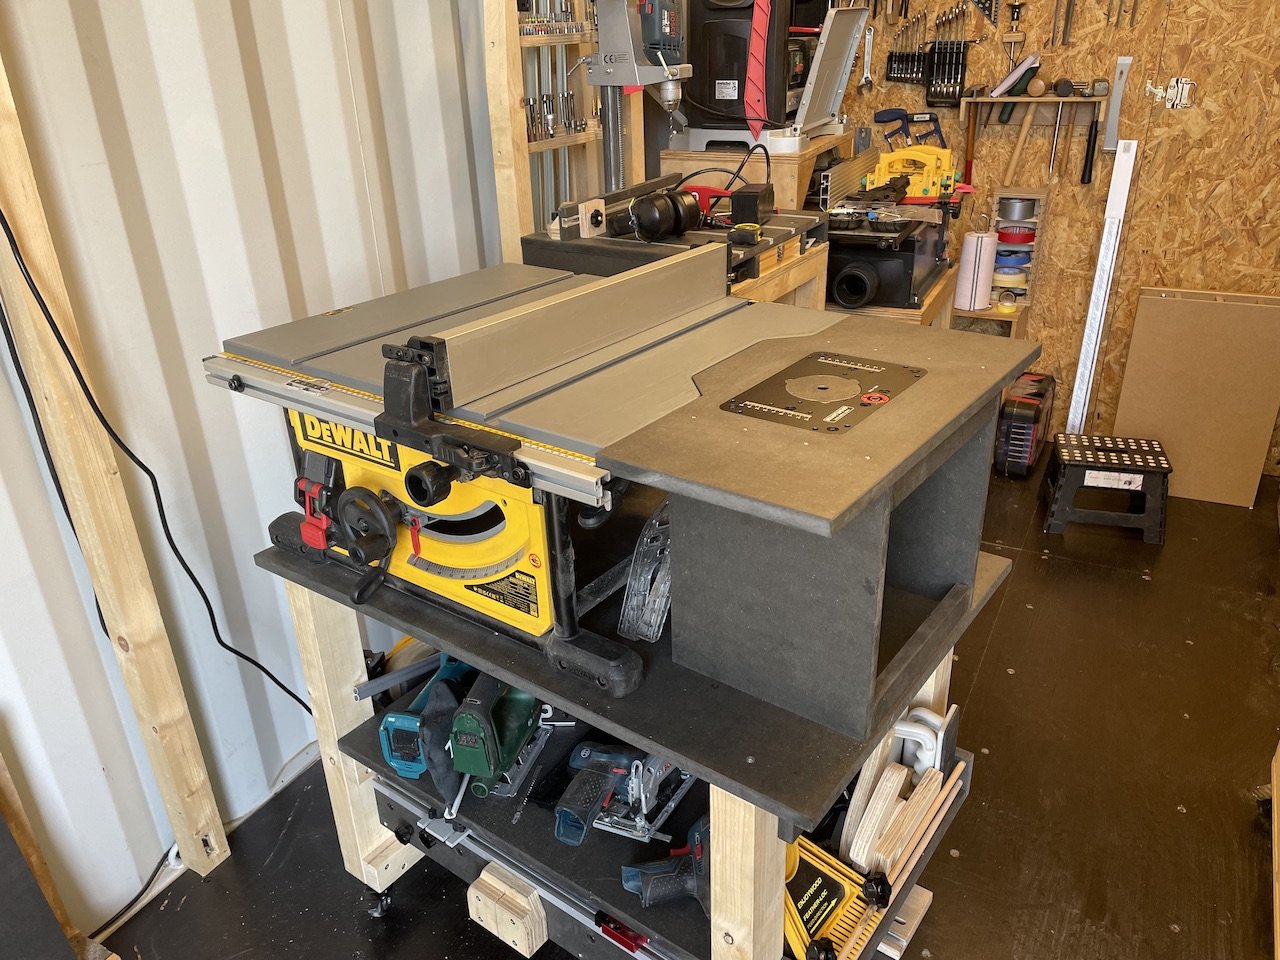
Remember that empty space to the right of my DeWalt table saw's mobile stand? The one I'd been eyeing for a router table extension? Well, I'm thrilled to share that this high-priority project for early 2025 is now complete. But let me take you through the journey.

Building the Base
The measurements had to be precise: the overall base comes in at 33x29x29cm. Staying true to my material preferences, I used 19mm black MDF. Here's where some hard-learned wisdom comes in: I deliberately avoided screws in the base structure. Why? Black MDF has a stubborn relationship with edge-mounted screws—they don't hold well, and the material tends to split even with pre-drilling.
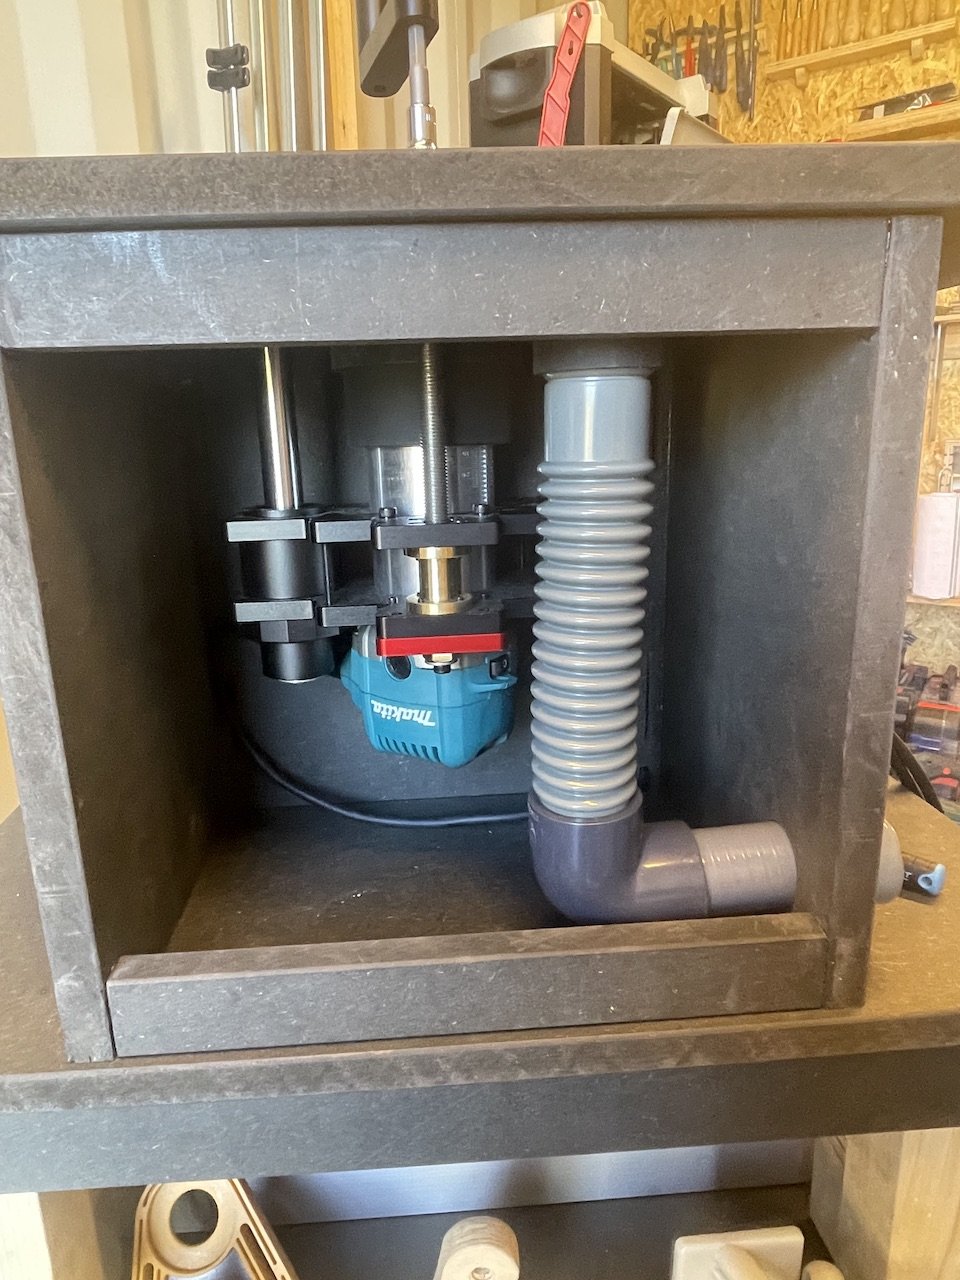
Instead, I joined the sides and back with flat dowels and glue, while the front stabilizing strips were simply glued in place. The connection to the DeWalt table saw? That's where creativity came in. I utilized the saw's solid right handle, connecting it to the router stand's back wall using two M6 square U-bolts. The result? Rock-solid stability.


The Router Insert Decision
This is where I faced another crossroads: DIY plexiglass construction, a standalone precision insert, or a router insert and lift combination. I decided to treat myself to the luxury option—the Enjoywood router lift. And I haven't regretted it for a moment. The solid construction, fine finish, and magnetic inserts make it a joy to use. Sure, it was a bit more expensive, but the thought of constantly adjusting bit height from under the table convinced me it was worth every penny.
Installation was straightforward, though I had to make some adjustments to their provided template. The end result? A perfectly fitting router insert with plenty of clearance thanks to the DeWalt table's height.


Choosing the Right Router
Here's where experience guided my decision-making. While I already owned the Bosch AdvancedTrimRouter 18V-8, I opted for a dedicated corded router for three crucial reasons:
Safety: In an emergency, reaching for a battery tool's power switch isn't ideal. A proper safety switch provides much quicker response.
Dust Collection: Having the router automatically trigger the vacuum system when started is incredibly practical.
Convenience: I wanted to avoid the constant installation/removal dance when needing the router elsewhere.
The choice? The Makita RT0702C—a powerhouse in its category with outstanding build quality. With it’s 65mm diameter it also is a perfect fit to the Enjoywood router lift.
Stay tuned for my next installment, where I'll share the fence and dust collection solutions that complete this router table setup.